|
|
||
|
|
||
|
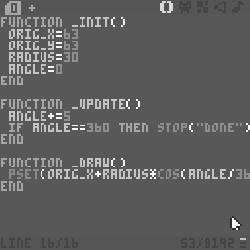
Pico 8 - Cheat Sheet++ This is not a tutorial ++As mentioned elsewhere on this site, this is not intended to be a tutorial. It's simply a place to store what I've learned about Pico8 in a format I can understand and refer back to for the future when I innevitably forget how to move a sprite round the screen. As I type this I am worried that I'll hit a brick wall when it comes to two things: dealing with multiple sprites (is it Types, Tables or Lists - I've never been that good with either) and collision checks (I think it's all bounding-box but I'm not sure). Anyway, I hope I'm able to push on through that. We'll see. (If you want to follow this in order, start at the bottom and work your way up) (The code in the code windows may overflow on some browsers - phones mostly. I can't be bothered to work out why) Circles and TrigonometryTrigonomentry! Apparently, Pico-8 is not the best place to learn about Trigonometry itself as it deals with it in kind of a funny way. However, in order to plot the points of a circle, you need to:
You can then cycle through all the angles 0-360 to get your circle. function _init()
orig_x=63
orig_y=63
radius=30
angle=0
end
function _update()
angle+=5
if angle==360 then stop("done") end
end
function _draw()
pset(orig_x+radius*cos(angle/360),orig_y+radius*sin(angle/360),7)
end
Tables #2text goes here function _init()
init_balls()
end
function _update()
update_balls()
end
function _draw()
cls()
draw_balls()
end
-- user functions --
function init_balls()
ball={}
for f=1,5 do
add(ball,{bx=rnd(120)+4,by=rnd(120)+4,bxx=1,byy=1})
end
end
function update_balls()
for f in all(ball) do
f.bx+=f.bxx
f.by+=f.byy
if f.bx<5 or f.bx>123 then f.bxx=-f.bxx end
if f.by<5 or f.by>123 then f.byy=-f.byy end
end
end
function draw_balls()
for f in all(ball) do
circ(f.bx,f.by,4,7)
end
end
Passing Values to a FunctionA value can be passed to a function by placing the appropriate variable inside the function's brackets. These can then be picked up inside the function itself by a new set of variables, also in the brackets, and manipulated. Depending on the function's ...function(!) it can undertake its own arithmatic and then return TRUE or FALSE. Doing so will bring the function to an abrupt end and return the program to the point where it left. Therefore, with the appropriate values passed to a function it can become a validation check in its own right, i.e. IF OVERLAP(PLAYER,SHIP) THEN GAMEOVER=1 END If the function above returned false, the gameover variable would not be changed. function _init() px=10 py=10 ex=64 ey=64 backcol=0 end function _update() moveplayer() if checkcol(px,py) then backcol=8 else backcol=0 end end function _draw() rectfill(0,0,127,127,backcol) pset(px,py,11) pset(ex,ey,10) end -- user functions -- function moveplayer() if btn(0) then px-=1 end if btn(1) then px+=1 end if btn(2) then py-=1 end if btn(3) then py+=1 end end function checkcol(checkx,checky) if checkx==ex and checky==ey then return true end return false end  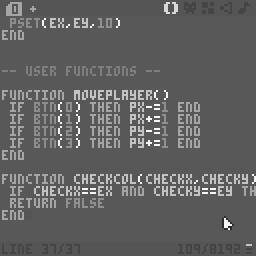
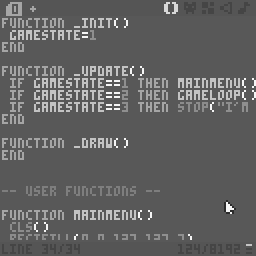
State Engine(or my interpretation anyway) Main game loops can get cluttered with code once they get to a certain length and extra care has to be taken to make sure your code doesn't interfere with, or affected by, other code within the main game loop. To prevent this, seperate the project into game states. That way, a main loop can deal solely with the options or main menu without dealing with the actual gameplay. Within the game itself, it can also help separating game states such a player walking left/right or climbing a ladder. I guess there are a number of ways to control the Finite Engine, but at my level asigning simple 1,2,3,etc. values to it is fine for now. function _init()
gamestate=1
end
function _update()
if gamestate==1 then mainmenu() end
if gamestate==2 then gameloop() end
if gamestate==3 then stop("i'm done!",15,123,7) end
end
function _draw()
end
-- user functions --
function mainmenu()
cls()
rectfill(0,0,127,127,7)
rectfill(3,3,124,124,0)
print("press 'z' to continue",20,60,7)
if btnp(4) then
cls()
gamestate=2
end
end
function gameloop()
line(flr(rnd(120))+3,flr(rnd(118))+5,flr(rnd(120))+3,flr(rnd(118))+5,flr(rnd(16)))
print("press 'x' to end",0,0,7)
if btnp(5) then
gamestate=3
end
end
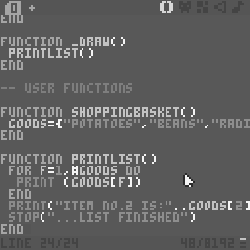
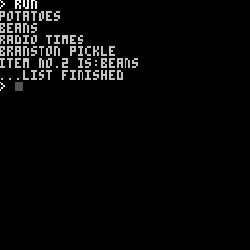
Tables #1Okay - I think this is a table (...or is it a list?) - I may have to come back and correct this at a later point when I find out I'm totally wrong! Defined and populated by assigning values within curly brackets. The total number of values in a table can be returned by using a hash-tag infront of the table name. When referring to individual values in a table, they are accessed with square brackets []. (Edit: I realise placing a STOP command within a function like this isn't 'best practice')
function _init()
	shoppingbasket()
end

function _update()
end

function _draw()
	printlist()
end

-- user functions

function shoppingbasket()
	goods={"potatoes","beans","radio times","branston pickle"}
end

function printlist()
	for f=1,#goods do
		print (goods[f])
	end
	print("item no.2 is:"..goods[2])
	stop("...list finished")
end
For / Next Loops and ConcatenateFairly straight-forward stuff. Just add the extra value if you want to count every 2, 3,4..etc. To concatenate strings, use two dots '..' between the strings. 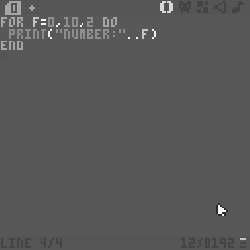 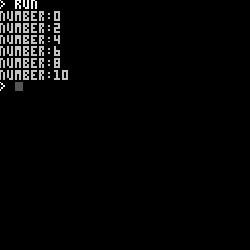
Buttons / Input
function _init()
	lastbutton="none"
end

function _update()
	if(btn(0)) then lastbutton="left" end
	if(btn(1)) then lastbutton="right" end
	if(btn(2)) then lastbutton="up" end
	if(btn(3)) then lastbutton="down" end
	if(btn(4)) then lastbutton="z" end
	if(btn(5)) then lastbutton="x" end
end

function _draw()
	cls()
	print ("last button:"..lastbutton,20,60)
end
In short...
The code above will check each frame for the current key pressed down causing it to repeat very quickly. To check only once (pressed), use BTNP(#) ...although this does seem to repeat every second or so - I'll look into this later. 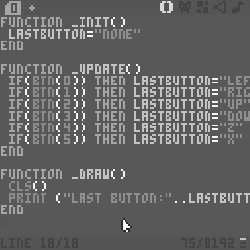 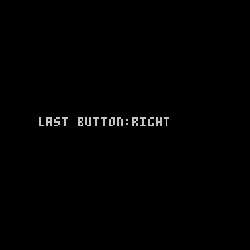
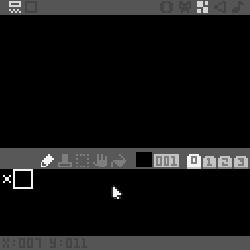
Filling those functionsAs a quick example of what the functions do, I'm going to place sprite 0 (which is a small 'x' character) in the middle of the screen.
So... INIT() = set it, UPDATE() = change it, DRAW() = show it. 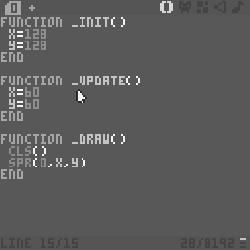
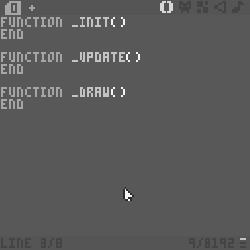
Function FrameworkPico8 works within the following framework:
ColoursAs explained on my homepage, I can only afford a black & white internet licence so these colours may not pop as much as you're used to. If you really want to see them in all their gawdy colour, just click on the image (...if you must). 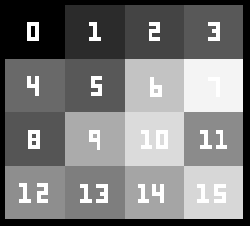
Basics firstPressing escape switches from the command line to the code editor. I shall add to these as I discover them, but for now the main ones are:
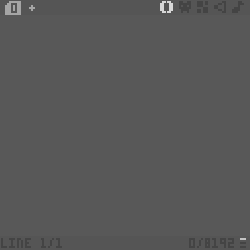
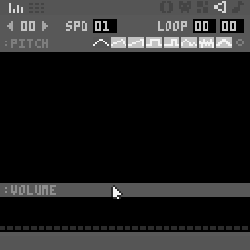
Once in the code editor window, pressing ALT+CURSORS (left/right) will flip between the different editors. Going left to right they are: code editor, sprite editor, map editor, sound fx editor and the music editor." 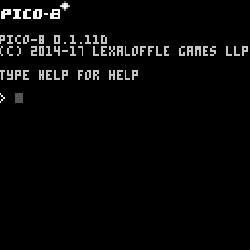
...ends. |